Introduction
Only a limited number of applications read raw MySQL tables. A CSV file is much more likely to work with different database applications. CSV is a standard format for databases in which a comma distinguishes values from different rows and columns. The added benefit of CSV files is that they are human-readable.
This detailed guide will show you how to export a MySQL database to a CSV file.
Prerequisites
- Access to a command line/terminal window
- User account with root or sudo privileges
- A MySQL user account with root privileges
- Preconfigured phpMyAdmin account (optional)
Export MySQL to CSV with phpMyAdmin
The phpMyAdmin tool provides a graphical interface for managing your MySQL databases. You can use it to export any of its tracked databases to a CSV file.
- Start by logging in to phpMyAdmin.
- Next, click on the Databases button on the top banner.
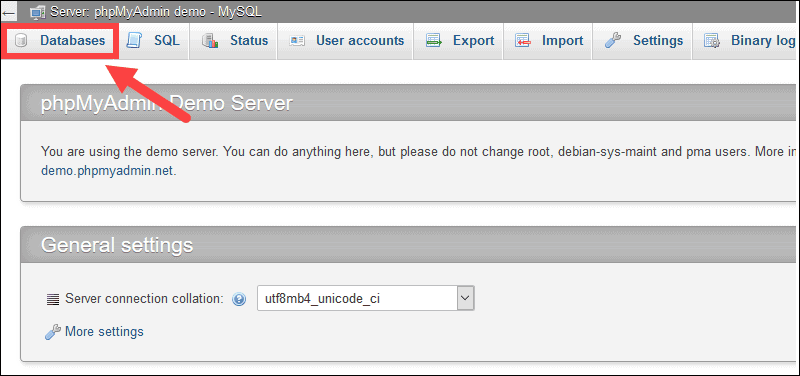
- On the list of Databases, click the link to the database you want to export. In this example, we selected the user database.

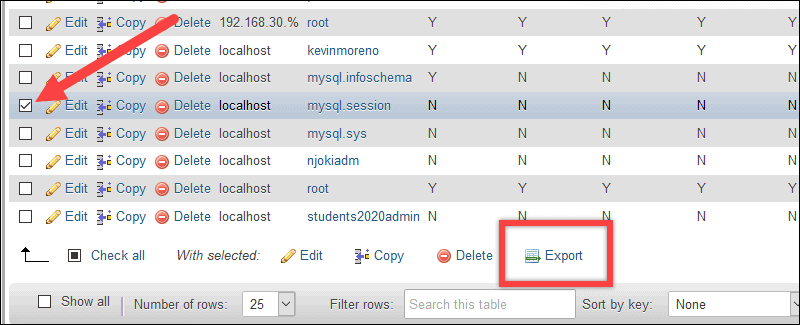
- The next screen displays a list of tables in that database. Check the boxes for the tables you want to export.
- Click the Export button on the banner.
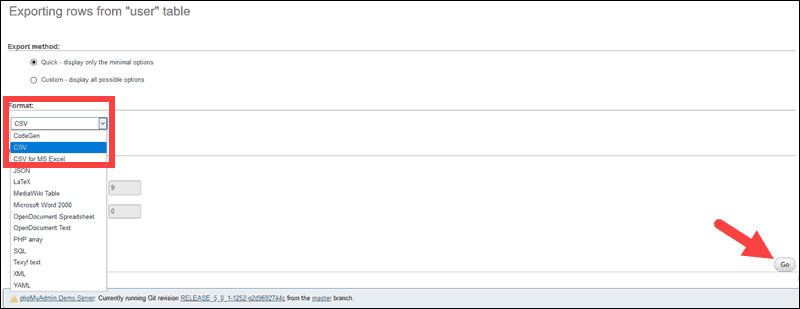
- Leave Export method set as-is. Use the Format drop-down menu to select CSV, then click Go.
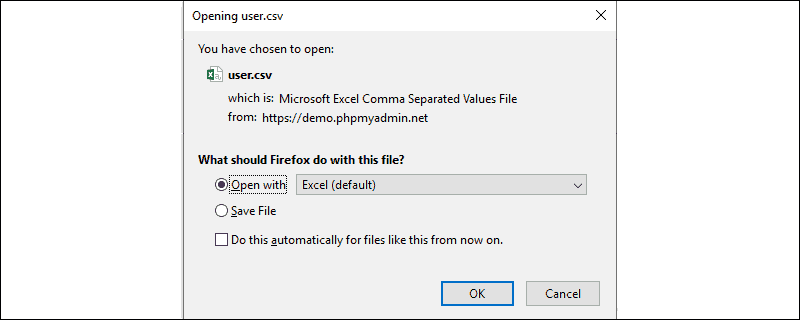
- A dialog box prompts to specify the location where to want to save the CSV file.
Export from MySQL to CSV Using Command Line
You can do a no-frills export by selecting all the data in a table, and specify the location to save it to.
Start by opening the MySQL shell, then switch to the database you want to export.
Enter the following statement:
SELECT * FROM myTable
INTO OUTFILE '\tmp\myExportFile.csv'
FIELDS ENCLOSED BY '"'
TERMINATED BY ';'
ESCAPED BY '"'
LINES TERMINATED BY '\r\n';
Replace myTable with the actual name of the table from your database. You can replace \tmp\myExportFile.csv with any other filename or location. Make sure to keep the .csv filename at the end.
Note: This example uses a Linux file location. If you're working in Windows, you can use C:/folder/file.csv for your file location.
Additional Options for Exporting from MySQL
To specify individual data sets to export from a table:
SELECT column1, column2, column3, column4
FROM myTable
WHERE column2 = 'value';
Replace column1 (and the rest) with the actual names of columns you want to export. Make sure to use the FROM command to specify the table you're exporting from. The WHERE statement is optional, and it allows exporting only rows that contain a specific value. Replace value with the actual value you want to export. For example:
SELECT order_date, order_number, order_status
FROM current_orders
WHERE order_status='pending';
Note: The WHERE clause can be useful for filtering results.
Export and Timestamp CSV File
Use the following command to export to a CSV file, and add a timestamp for the time the file was created:
SET @TS = DATE_FORMAT(NOW(),'_%Y_%m_%d_%H_%i_%s');
SET @FOLDER = '\tmp';
SET @PREFIX = 'myTable';
SET @EXT    = '.csv';
SET @CMD = CONCAT("SELECT * FROM myTable INTO OUTFILE '",@FOLDER,@PREFIX,@TS,@EXT,
"' FIELDS ENCLOSED BY '\"'
 TERMINATED BY ';'
ESCAPED BY '\"'","
LINES TERMINATED BY '\r\n';");
PREPARE statement FROM @CMD;
EXECUTE statement;
As usual, replace myTable with the actual name of the table you're exporting.
Note: You may notice the SELECT * FROM command inside the parentheses. We've wrapped the command in a function that adds a timestamp.
Export with Column Headers
Use a UNION statement to add column headers to the exported file:
(SELECT 'column1','column2','column3','column4')
UNION
(SELECT column1, column2, column3, column4
FROM myTable
INTO OUTFILE '\tmp\myExportFile.csv'
FIELDS ENCLOSED BY '"' TERMINATED BY ';' ESCAPED BY '"'
LINES TERMINATED BY '\r\n')
Dealing with NULL Values
If there are any null (empty) values in the database, this process exports them as the letter N. You can replace NULL values with another string of text that makes more sense:
SELECT column1, column2, IFNULL(column3, 'N/A')
FROM myTable INTO OUTFILE '\tmp\myExportFile.csv'
FIELDS ENCLOSED BY '"'
TERMINATED BY ';'
ESCAPED BY '"' LINES
TERMINATED BY '\r\n');
In this case, the IFNULL command looks for empty values in column3. When it finds them, it replaces them with the text string N/A.
Export MySQL to CSV Using mysqldump
You can use the mysqldump application to export your MySQL database to a CSV file. Enter the following into a command prompt:
mysqldump --tab=/var/lib/mysql-files/ --fields-enclosed-by='"' --fields-terminated-by=',' --lines-terminated-by='\n' myTableThis command creates a copy of the database myTable in the /var/lib/mysql-files.
Note: Your user account must have privileges to access the directory the CSV file is saved in. You can save to a different path, but it must be a path MySQL has full access to.
Export MySQL to CSV Using CSV Engine
In some cases, you can use the CSV engine in MySQL to change the table. This method won't work if a MySQL table has an index, or if the table uses auto_increment. Use the following command:
ALTER TABLE myTable ENGINE=CSV;This statement changes the format of the database to CSV. You can then copy the CSV file to another system.
Conclusion
You now have four ways to export your MySQL database to a CSV file. If you have access to phpMyAdmin, it's by far the most accessible tool to use.
If you're working from a command-line interface, the SELECT INTO command is the most reliable method. In certain configurations, the CSV Engine or mysqldump method can also save a lot of time.
Now that you know how to export MySQL database to a CSV file, the next step would be to learn how to import CSV into MySQL database.